Jobs
Opening the Jobs screen will show details for all jobs (also called tasks) assigned to you or your user group.
At the top of the screen, you can open the search bar, sort the current jobs in the list or filter your view.
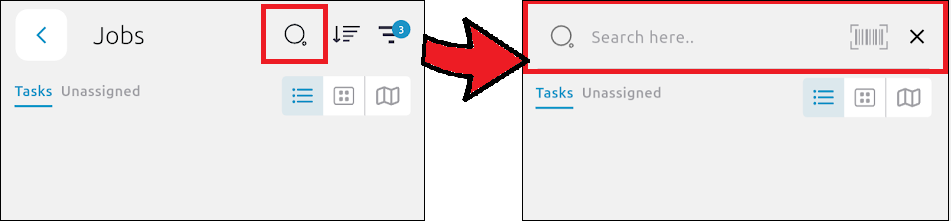
Use the search bar to look up:
- Customer name
- Order reference
- NHS reference
You can also scan a barcode by using the barcode scan icon in the search bar. This will search the Jobs list for the customer data and display relevant results.

Sort the current jobs by:
- First name: A-Z
- First name: Z-A
- Last name: A-Z
- Last name: Z-A
- Date: Oldest-Newest
- Date: Newest-Oldest

Filter your view by the following parameters:
- Due Dates:
- Overdue
- Overdue / due today
- Overdue, due today / tomorrow
- Due today
- Due today / tomorrow
- Due tomorrow
- Custom date
- Entities
- Status
- Current
- Pending
- Task types
- View
- Assigned to me
- Created by me
- Customer tags
- Order tags
- Task tags (if available in your configuration)
- Location
- Anywhere
- Within 10m
- Within 20m
- etc.
Using the Select a default route option
Creating a new job
To create a new job, simply scan the QR code. Where customer defaults are present, an order will automatically be created.
+Quick order automatically creates and order with a task based on the saved default information (which can be set on PDM Web). These defaults can include:
- customer tags
- delivery address
- order tags
- saved order and task notes.
If a default is missing, you will be prompted to enter the missing information before proceeding.
Click Save when you're done.
+New order allows you to view and add extra information like:
- View the customers payment status
- Select which entity will be managing the order
- Number of packages
- Order note
- Tags (like CD or Fridge, for example)
- Options to change and add...
- delivery address
- who the delivery is assigned to
- target date and time for the delivery
- delivery note
- delivery tag
- add more tasks to be completed
Where a customer has default order information saved, this will be automatically filled in.
Click Save at the top right of the screen to save the order.
Adding jobs to a route
To select a job, tap the job and choose an option from the menu that appears at the bottom of the screen.
If there is more than one job in the list, you will have the Select all option at the top right of the screen.
Once the jobs that are ready to be added to a route are selected, choose the Add to Route option from the menu.